

Step 1: Disable
Firewall and SELinux:
- To disable the
firewall, run the following commands:
```
systemctl
disable firewalld
systemctl
stop firewalld
```
- SELinux is a
security feature, but it's disabled in this setup. To disable SELinux, open the
SELinux configuration file:
```
vi
/etc/selinux/config
```
Change the
line `SELINUX=enabled` to `SELINUX=disabled`.
Step 2: Update
Hostname and /etc/hosts:
- Update the
hostname with the FQDN:
```
hostnamectl
set-hostname your.server.example.com
```
- Edit the hosts
file to map the server's IP address to the FQDN:
```
vi /etc/hosts
```
Add a line
like this:
```
xxx.xxx.xxx.xxx your.server.example.com
```
Step 3: Change SSH Port:
- To change the SSH
port, open the SSH configuration file:
```
vi
/etc/ssh/sshd_config
```
Find the line
`#Port 22` and change it to your preferred port number, for example:
```
Port 2222
```
Step 4: Update
System:
- Update your system
and install `wget`:
```
yum install
wget -y
```
- Add the GoAutoDial
repository:
```
cd
/etc/yum.repos.d/
wget
http://downloads2.goautodial.org/centos/7/goautodial.repo
```
- Update the system:
```
yum update -y
```
- Reboot the server:
```
reboot
```
Step 5: Install
Dependencies:
- Install essential
packages and development tools:
```
yum install
-y epel-release
yum
groupinstall "Development Tools" -y
```
Step 6: Install Perl
Scripts and Dependencies:
- Install Perl
scripts and a missing dependency:
```
wget
https://rpm.mag-sol.com/Centos/7/x86_64/perl-Sys-RunAlone-0.12-1.el7.centos.noarch.rpm
rpm -i
perl-Sys-RunAlone-0.12-1.el7.centos.noarch.rpm
```
Step 7: Install
Required Software:
- Install various
software packages, including MariaDB, PHP, Asterisk, Kamailio, and more:
```
yum install y MariaDB-server MariaDB-devel php70w-mysql php70w-mcrypt
php70w-devel php70w-mbstring php70w-common php70w-xml php70w-pear php70w-cli
php70w-imap php70w-fpm php70w-gd php70w>opcache php70w-pdo php70w-process php70w
php70w-intl php70w-pear.noarch php70w-xmlrpc asterisk-mysql-13.17.2-vici.el7.centos.x86_64
asterisk-perl-0.08-2.go.x86_64
asterisk-voicemail-plain->13.17.2-vici.el7.centos.x86_64
asterisk-devel-13.17.2-vici.el7.centos.x86_64
asterisk-voicemail-13.17.2-vici.el7.centos.x86_64 asterisk-alsa-13.17.2-vici.el7.centos.x86_64
asterisk-sip->13.17.2-vici.el7.centos.x86_64
asterisk-13.17.2-vici.el7.centos.x86_64
asterisk-dahdi-13.17.2-vici.el7.centos.x86_64
asterisk-iax2-13.17.2-vici.el7.centos.x86_64
asterisk-mp3-13.17.2->vici.el7.centos.x86_64 kamailio-tls kamailio
kamailio-mysql kamailio-ims kamailio-utils kamailio-websocket kamailio-json
perl-Math-Round perl-File-Touch perl-Sys-RunAlone perl-Switch
perl->Time-Local ngcp-rtpengine ngcp-rtpengine-kernel ngcp-rtpengine-dkms
dkms dahdi-linux dahdi-linux-devel kernel-devel perl-DBD-mysql perl-Net-Telnet
lame httpd mod_ssl screen crontabs mailx net->tools readline readline-devel
ncurses ncurses-devel tk tk-devel htop perl-DBI perl-Digest-HMAC perl-YAML
perl-ExtUtils-ParseXS perl-NetAddr-IP perl-Crypt-SSLeay perl-Curses perl-DBD-Pg
perl->Module-ScanDeps perl-Text-CSV perl-HTML-Template perl-IO-Compress
perl-Text-Glob perl-Jcode perl-Test-Script perl-Archive-Tar perl-Test-Base
perl-OLE-Storage_Lite perl-Archive-Zip perl-Net->Server perl-Convert-ASN1
perl perl-Compress-Raw-Zlib perl-Digest-SHA1 perl-Data-Dumper perl-Error
perl-ExtUtils-CBuilder perl-Test-Tester perl-Parse-RecDescent perl-Spiffy
perl-IO-Zlib perl->Module-Build perl-HTML-Parser perl-Net-SSLeay
perl-Proc-ProcessTable perl-TermReadKey perl-Term-ReadLine-Gnu perl-Digest-SHA
perl-Tk perl-Net-SNMP perl-Test-NoWarnings perl-XML-Writer
perl->Proc-PID-File perl-Compress-Raw-Bzip2 perl-libwww-perl perl-XML-Parser
perl-File-Remove perl-Parse-CPAN-Meta perl-Set-Scalar perl-Probe-Perl
perl-File-Which perl-Package-Constants perl-Module->Install
perl-File-HomeDir perl-Spreadsheet-ParseExcel perl-Mail-Sendmail
perl-Spreadsheet-XLSX perl-version perl-Crypt-DES perl-URI perl-Net-Daemon
perl-IO-stringy perl-YAML-Tiny perl-HTML->Tagset perl-Socket6
perl-BSD-Resource perl-PlRPC perl-IPC-Run3 perl-Text-CSV_XS perl-Unicode-Map
perl-Module-CoreList perl-Net-Telnet perl-PAR-Dist perl-Date-Manip perl-JSON
perl-Proc-Daemon >perl-Spreadsheet-WriteExcel perl-rrdtool sox ntp iftop
subversion glibc.i686 mod_fcgid
```
These steps cover
the initial server setup and software installation. In the following steps,
we'll configure specific settings and set up GoAutoDial with a FQDN.
Certainly, let's continue with the setup:
Step 8: Install
CPAN and Perl Scripts:
- Install CPAN (Perl module manager):
```
cpan -i CPAN
```
- Install Perl scripts and their dependencies:
```
cpan -i Tk String::CRC Tk::TableMatrix
Net::Address::IP::Local Term::ReadLine::Gnu Spreadsheet::Read
Net::Address::IPv4::Local RPM::Specfile Spreadsheet::XLSX Spreadsheet::ReadSXC ```
Step 9:
Enable and Start Services:
- Enable and start the required services:
```
systemctl enable
php-fpm
systemctl enable
httpd
systemctl enable
mariadb
systemctl enable
kamailio
systemctl enable
ngcp-rtpengine
systemctl start
mariadb
```
Step 10:
Install GoAutoDial:
- Install GoAutoDial:
```
yum -y install
goautodial-ce
cd
/usr/src/goautodial
./install.sh
```
- Reboot the server. Some databases are created during the
reboot:
```
reboot
```
Step 11:
Confirm Databases Created:
- Access the MySQL :
mysql
MariaDB [(none)]>show databases;
Should show 8 Databases
asterisk
goautodial
information_schema
kamailio
mysql
osticketdb
performance_schema
test
8 rows in set (0.00 sec)
Step 12:
Update GoAutoDial Table in MySQL:
- Use the GoAutoDial database:
```sql
use goautodial;
```
- Add some columns to tables:
```sql
ALTER TABLE
go_campaigns ADD COLUMN manual_dial_min_digits INT DEFAULT '6';
ALTER TABLE users
ADD COLUMN enable_webrtc tinyint(1) DEFAULT '1';
```
Step 13:
Update GoAutoDial with Git:
- Update GoAutoDial using Git:
```
cd /var/www/html
git stash
git pull
cd
/var/www/html/goAPIv2
git stash
git pull
```
Step 14:
Change File Ownership:
- Change the ownership of certain files:
```
chown apache.apache
-R /var/www/html
```
Step 15:
Update Crontab:
- Edit the crontab:
``` (be sure
to add --HTTPS to end of 4th line of recording scripts)
1,4,7,10,13,16,19,22,25,28,31,34,37,40,43,46,49,52,55,58 * * * *
/usr/share/astguiclient/AST_CRON_audio_2_compress.pl --MP3 --HTTPS
```
- Add `--HTTPS` to the end of the 4th line of recording
scripts.
Step 16:
Update IPs and FQDN:
- Edit Kamailio configuration:
vi /etc/kamailio/kamailio.cfg
Around line 136:
#!substdef "!MY_IP_ADDR!10.10.100.164!g" (use your IP address)
#!substdef "!MY_DOMAIN!xxxxx.xxxxx.xxx!g" (use your FQDN)
/* add local domain
aliases */
alias="subdomain.domainname.com"
alias="domainname.com"
```
- Modify the IP address and FQDN to match your server.
- Edit RTPEngine configuration:
```
vi
/etc/rtpengine/rtpengine.conf
Around line 8:
a single interface:
interface = 10.10.100.164 (use your IP address)
```
- Update the interface with your server's IP address.
Step 17: Update GoAutoDial Web Application:
- Edit the GoAutoDial web application settings:
```
GOautodial web
application
vi /var/www/html/php/goCRMAPISettings.php
Change IP address to your FQDN and then restart Kamailio and RTPEngine.
```
- Change the IP address to your FQDN.
Step 18: Change
Kamailio Domain:
- Edit the SIP configuration file:
```
vi
/etc/asterisk/sip-goautodial.conf
[kamailio]
;encryption=yes ;uncomment for TLS encryption
disallow=all
allow=opus
allow=ulaw
type=friend
dtmfmode=rfc2833
context=default
qualify=yes
nat=force_rport,comedia
host=xxxxxxx.xxxxxxx.xxx ;change me to my FQDN
insecure=port,invite
```
- Update the host parameter with your FQDN.
Step 19: Set
Domain in HTTP.CONF:
- Edit the Apache HTTP server configuration:
```
vi /etc/httpd/conf/httpd.conf
uncomment Servername and change to your FQDN
(xxxx.xxxx.xxx:80)
```
- Uncomment the ServerName line and set it to your FQDN.
Step 20: Update Default Time Zone:
- Edit the PHP configuration file:
```vi /etc/php.ini
date.timezone = Asia/kolkata (change to your timezone) ```
- Update the `date.timezone` setting with your timezone.
Step 21: Run Update IP Script:
- Run the IP update script:
```
/usr/share/astguiclient/ADMIN_update_server_ip.pl
```
- It should show the old IP as `127.0.0.1`.
Step 22: Update Self-Signed SSL Cert
- Generate a new self-signed SSL certificate for your
server.
openssl req -x509 -nodes -days 365 -newkey rsa:2048 -keyout
/etc/pki/tls/private/localhost.key -out /etc/pki/tls/certs/localhost.crt
Step 23: Create a Link for Recordings:
- Create a symbolic link for recordings if needed.
If you have an issue with recordings
a solution is to manually create an symbolic link in
the folder html named RECORDINGS poiting to the file where asterisk store the
recordings
files.
cd /var/www/html
ln -s /var/spool/asterisk/monitorDONE/ RECORDINGS
If you get NOT AUTHORIZED errors you must change
the chmod of all the folders in the
path /var/spool/asterisk/monitorDONE/MP3/.
Step 24: Reboot
- Reboot the server to ensure all changes are applied:
```
reboot
```
Step 25: Check Service Status:
- Check the status of important services:
```
systemctl status
ngcp-rtpengine
systemctl status
kamailio
asterisk -vvvvvr
```
Step 26: Log In as Admin:
- Access the GoAutoDial admin interface using a web browser:
```
https://your.server.example.com
```
- Log in with the provided admin credentials.
USER: goadmin
PASSWORD: G0autodial2018
Step 27: Configure GoAutoDial:
- Update settings and configurations within the GoAutoDial
admin interface, including the Base URL, Company Name, Timezone, and more.
ADMINISTRATION>SETTINGS:
Change Base URL to
your FQDN
Change Company Name
Change Timezone
ADMINISTRATION>GOWEBRTCSETTINGS:
Change WebRTC
Websocket to FQDN
Change WebRTC SIP Host/IP to FQDN
Change Kamailio Domain to FQDN
SETTINGS>SERVERS:
Advanced Settings:
Generate Conf Files: YES
Rebuild Conf Files: YES
Rebuild Music On Hold: YES
Alt Recording Server IP: FQDN
External Server IP: FQDN
Step 28: Test GoAutoDial:
- Create users, campaigns, and test the GoAutoDial
functionality through the web interface.
By following these simplified and detailed steps, even
someone with limited technical knowledge should be able to set up a GoAutoDial
server with an FQDN.
Step 29: Create a New SIP Carrier:
- In the GoAutoDial admin interface, navigate to **SETTINGS
> CARRIERS**.
- Create a new SIP carrier, ensuring that you use a 10-digit
DIAL PREFIX.
Step 30: Configure Campaigns:
- In the GoAutoDial admin interface, navigate to **TELEPHONY
> CAMPAIGNS**.
- Configure campaigns as needed, making sure to set the Dial
Method to MANUAL, associate the newly created SIP carrier, and set the dialing
to 24 hours if required.
Step 31: Reboot Again for Configuration Files:
- To make sure that the new configuration files are used,
reboot the server once more:
```
reboot
```
Step 32: Create New Users:
- In the GoAutoDial admin interface, navigate to **TELEPHONY
> USERS**.
- Create new admin users and delete any default users as
needed.
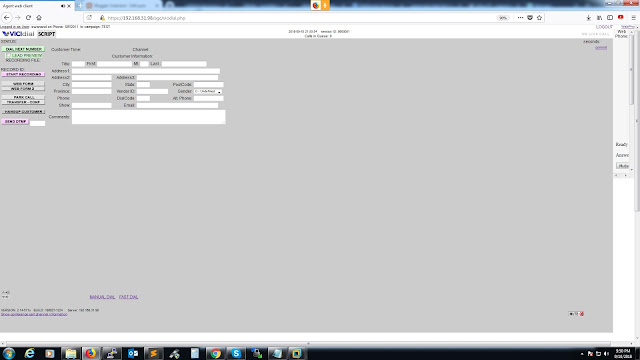
Step 33:
Test Your Fully Functional GoAutoDial:
- Using an incognito or private browsing window in your web
browser, log in as one of the newly created agents and test the call
functionality.
Congratulations! You should now have a fully functional
GoAutoDial instance with an FQDN, and you've successfully configured it step by
step. If you encounter any issues or need further assistance, please refer to
the official GoAutoDial documentation or seek help from the GoAutoDial community
forums.
**IMP**
FQDN stands for "Fully Qualified Domain Name." It is a complete domain name that specifies the exact location of a host within the Domain Name System (DNS) hierarchy. An FQDN provides the absolute path to a specific resource on the internet.
Soratemplates is a blogger resources site is a provider of high quality blogger template with premium looking layout and robust design
0 comments:
Post a Comment