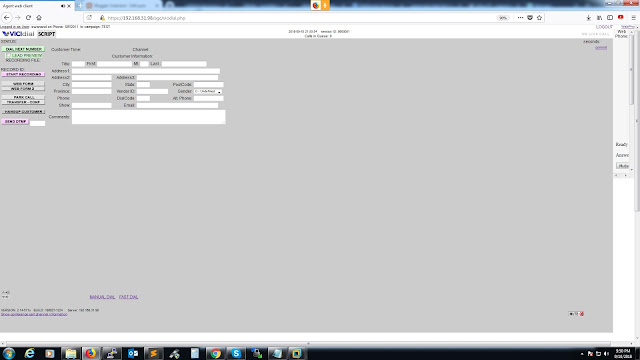
Installing Vicidial Version 11 on AWS (Amazon Web Services)
can be a complex process, However, I'll provide a simplified step-by-step
overview for educational purposes, but please note that performing this
installation may require advanced technical skills.
Note: This guide assumes you have an AWS account set
up and a running instance with a compatible operating system like CentOS.
Step 1: Launch an AWS EC2 Instance
1. Log in to your AWS account.
2. Go to the EC2 Dashboard and click "Launch
Instance."
3. Choose an Amazon Machine Image (AMI) with CentOS.
4. Select an instance type based on your needs and click
"Next" through the configuration options.
5. Add storage, configure security groups, and create or use
an existing key pair.
6. Review and launch the instance.
Step 2: Connect to Your EC2 Instance
1. Use SSH to connect to your EC2 instance using the key
pair you created during instance setup.
```
ssh -i
/path/to/your/keypair.pem ec2-user@your.ec2.instance.ip
```
Step 3: Update the System
1. Update the package list and install necessary packages.
```
sudo yum update
```
Step 4: Disable SELinux
1. Disable SELinux to prevent conflicts with Vicidial.
```
sudo setenforce 0
```
Step 5: Install Required Software Packages
1. Install essential packages.
```
sudo yum install
wget net-tools nano perl-CPAN perl-libwww-perl unzip sox ncurses-devel libsrtp
```
Step 6: Install MariaDB (MySQL) Database
1. Install MariaDB.
```
sudo yum install
mariadb-server
```
2. Start and enable MariaDB.
```
sudo systemctl
start mariadb
sudo systemctl
enable mariadb
```
3. Secure your MariaDB installation.
```
sudo
mysql_secure_installation
```
Step 7: Install Apache Web Server
1. Install Apache.
```
sudo yum install
httpd
```
2. Start and enable Apache.
```
sudo systemctl
start httpd
sudo systemctl
enable httpd
```
Step 8: Install PHP
1. Install PHP and related packages.
```
sudo yum install
php php-mysql php-gd php-mbstring
```
Step 9: Download and Install Vicidial
1. Download Vicidial V11 to your EC2 instance.
```
cd /usr/src
sudo wget
http://download.vicidial.com/iso/vicibox/server/11/VERSION/vicibox-vicidial-VERSION.noarch.rpm
```
2. Install Vicidial.
```
sudo rpm -Uvh
vicibox-vicidial-VERSION.noarch.rpm
```
Step 10: Configure Vicidial
1. Run the configuration script.
```
sudo perl
/usr/src/astguiclient/trunk/extras/quickVicidialConf.pl
```
2. Follow the on-screen instructions to set up Vicidial.
You'll need your MySQL root password and admin password.
Step 11: Start Vicidial Services
1. Update the server IP.
```
sudo
/usr/share/astguiclient/ADMIN_update_server_ip.pl
```
2. Update other areas.
```
sudo
/usr/share/astguiclient/ADMIN_area_update.pl
```
Step 12: Restart Services
1. Restart the services.
```
sudo systemctl
restart httpd
sudo systemctl
restart mysqld
sudo systemctl
restart asterisk
sudo systemctl
restart crond
sudo systemctl
restart astguiclient
```
Step 13: Access Vicidial Web Interface
1. Open a web browser and go to
`http://your.ec2.instance.ip/vicidial/admin.php`.
2. Log in with the admin credentials you set during
configuration.
Please note that
Vicidial installation on AWS can be challenging and may require troubleshooting
skills. This simplified guide provides a high-level overview of the process,
but actual setup and maintenance might need more advanced knowledge and
experience. Always consult official documentation and consider seeking
professional assistance if needed.
Step 14: Configure Your AWS Security Groups
To ensure your Vicidial server is secure and accessible from
the internet, you'll need to configure your AWS Security Groups to allow the
necessary inbound and outbound traffic. Here's how to do it:
1. Log in to your AWS Management Console.
2. Navigate to the EC2 Dashboard and click on "Security
Groups" in the navigation pane on the left.
3. Select the security group associated with your Vicidial
EC2 instance.
4. Click on the "Inbound Rules" tab and add the
following rules:
- HTTP (TCP port
80): Allow incoming traffic from 0.0.0.0/0 (anywhere).
- HTTPS (TCP port
443): Allow incoming traffic from 0.0.0.0/0 (anywhere).
- SSH (TCP port
22): Allow incoming traffic from your IP address or a trusted IP range for secure
SSH access.
5. Click "Save Rules" or "Apply Rules."
Step 15: Set Up SSL (Optional)
If you want to secure your Vicidial web interface with SSL,
you can obtain and install a free SSL certificate from Let's Encrypt. Here are
the basic steps:
1. Connect to your EC2 instance via SSH.
2. Install Certbot, a tool for obtaining SSL certificates:
```
sudo yum install
certbot python3-certbot-apache
```
3. Obtain and install an SSL certificate for your domain
(replace `your.domain.com` with your actual domain):
```
sudo certbot
--apache -d your.domain.com
```
4. Follow the prompts to configure SSL for your Vicidial web
interface.
Step 16: Additional Configuration (Optional)
Depending on your specific use case and requirements, you
may need to make additional configurations, such as:
- Configuring SIP carriers and trunks in Vicidial for
outbound calling.
- Setting up IVR (Interactive Voice Response) menus.
- Adding and configuring agents, campaigns, and call lists.
- Setting up call recording and monitoring features.
- Customizing your Vicidial interface to match your business
needs.
These tasks require a good understanding of Vicidial and
telephony systems and may not be suitable for beginners.
Step 17: Testing and Monitoring
After completing the initial setup and configuration, it's
essential to thoroughly test your Vicidial system to ensure it works as
expected. You should also regularly monitor your server's performance, call
quality, and system logs to identify and resolve any issues that may arise.
Remember that maintaining a Vicidial system, especially in a
production environment, requires ongoing management, updates, and support. It's
essential to have a good understanding of VoIP and contact center operations to
operate Vicidial effectively.
Please consider seeking professional assistance or
consulting Vicidial documentation and forums for more advanced configurations
and troubleshooting.


0 comments:
Post a Comment