
Overview:
In this guide, we will provide a step-by-step process to
integrate, enable, and configure the Vicibox webphone (a WebRTC phone) in
Vicibox (also applicable to any Vicidial-based system) using a self-signed SSL
certificate. This method allows for secure communication without the need for a
public IP address or fully qualified domain name (FQDN). These steps can also
be used with an FQDN.
Prerequisites:
1. Vicibox 9 or later.
2. Asterisk 13 and above (included in Vicibox 9).
3. Mozilla Firefox or Google Chrome web browsers.
Step 1: Generate a Self-Signed Certificate Using OpenSSL
- Run the following command to generate a self-signed SSL
certificate and key. Replace "viciphone" with your chosen name.
```
openssl req -x509
-nodes -days 365 -newkey rsa:2048 -keyout /etc/apache2/ssl.key/viciphone.key
-out /etc/apache2/ssl.crt/viciphone.crt
```
- Note: The default SSL path in Vicibox is
`/etc/apache2/ssl.crt` and `/etc/apache2/ssl.key`.
Step 2: Apache Configuration
Step 2.1: Edit the Vicibox vhost file:
- Open the vhost file for editing:
```
vi
/etc/apache2/vhost.d/1111-default-ssl.conf
```
- Modify the following lines with your certificate name:
```
SSLEngine on
SSLCertificateFile
/etc/apache2/ssl.crt/viciphone.crt
SSLCertificateKeyFile /etc/apache2/ssl.key/viciphone.key
```
- Save the file.
Step 2.2: Redirect HTTP to HTTPS:
- Edit the following file:
```
vi
/etc/apache2/vhost.d/1111.default.conf
```
- Add the following line after `DocumentRoot`:
```
DocumentRoot
/srv/www/htdocs
Redirect permanent /
https://yourserverip/
```
- Save the file.
- Restart Apache:
```
systemctl restart
apache2
```
Step 3: Asterisk Configuration for WebRTC Support
Step 3.1: Edit `/etc/asterisk/http.conf`:
- Open the file for editing:
```
vi
/etc/asterisk/http.conf
```
- Ensure the following settings are enabled:
```
enabled=yes
bindaddr=0.0.0.0
bindport=8088
tlsenable=yes
tlsbindaddr=0.0.0.0:8089
tlscertfile=/etc/apache2/ssl.crt/viciphone.crt
tlsprivatekey=/etc/apache2/ssl.key/viciphone.key
```
- Save the file.
Step 3.2: Edit `/etc/asterisk/modules.conf`:
- Open the file for editing:
```
vi
/etc/asterisk/modules.conf
```
- Add the following entry if not already enabled:
```
load =>
res_http_websocket.so
```
- Save the file.
- Reboot the server once to ensure that Asterisk starts with
HTTP Websocket loaded. To confirm, run the following command:
```
asterisk -rx 'http
show status'
```
- Ensure it displays: "HTTPS Server Enabled and Bound
to 0.0.0.0:8089."
Step 4: Downloading the Vicibox Webphone
- Official Link: [ViciPhone](https://viciphone.com)
- GitHub Link: [ViciPhone on
GitHub](https://github.com/vicimikec/ViciPhone)
- SSH to your Vicibox and run the following commands:
```
cd /var/tmp
git clone
https://github.com/vicimikec/ViciPhone.git
cd Viciphone
cp -r src
/srv/www/htdocs/agc/viciphone
chmod -R 755
/srv/www/htdocs/agc/viciphone
```
Step 5: Vicidial Configuration
Step 5.1: Go to ADMIN -> System Settings:
- Change the "Wephone URL" to:
```
Wephone URL:
https://yourserverip/agc/viciphone/viciphone.php
```
- Submit the changes.
Step 5.2: Go to ADMIN -> Servers:
- Configure the "External Server IP":
- If your server is
accessible from outside (public IP), enter your public IP here.
- If not, leave it
blank or enter your local server IP.
- Web Socket URL:
```
Web Socket URL:
wss://yourserverip:8089/ws
```
- If you are
accessing your server with a public IP, set the "External Web Socket
URL" to `wss://publicip/fqdn:8089/ws` or leave it blank.
- Submit the changes.
Step 5.3: Vicidial Websocket Template
- Go to Admin -> Templates and create a new template with
the following entries (edit the cert path) with the name
"vicitemplate":
```
type=friend
host=dynamic
encryption=yes
avpf=yes
icesupport=yes
directmedia=no
transport=wss
force_avp=yes
dtlsenable=yes
dtlsverify=no
dtlscertfile=/etc/apache2/ssl.crt/viciphone.crt
dtlsprivatekey=/etc/apache2/ssl.key/viciphone.key
dtlssetup=actpass
rtcp_mux=yes
```
- Submit the changes.
Step 5.4: Creating a Phone as a Webphone
- Go to Admin -> Phones and add a new phone (default).
- After adding a new phone, edit the following settings:
1. Set As Webphone:
Y
2. Webphone
Auto-Answer: Y
3. Use External
Server IP: N (if using an external IP, set this to Y)
4. Template: Select
the template created in Step 5.3 above.
Step 6: Browser Workaround
- On each agent PC browser, perform the following
workaround:
- Open Mozilla
Firefox or Google Chrome and browse the following two URLs. Accept the
certificate (accept the risk and continue):
-
`https://serverip/` (e.g., `https://192.168.29.99/`)
-
`https://serverip:8089/` (e.g., `https://192.168.29.99:8089`)
- Once the certificate is accepted, log in to the agent
portal with your username and password:
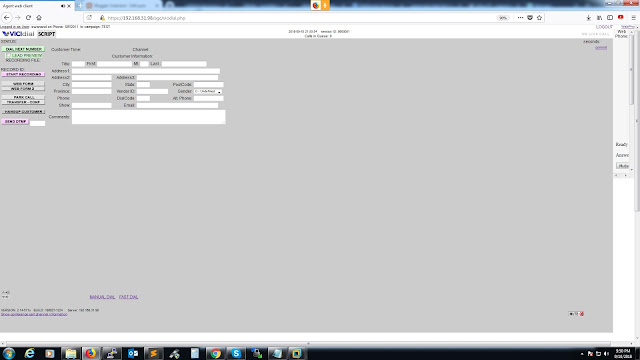
- `https://serverip/agc/vicidial.php`
- Note: Press
"Call Agent Webphone" to get connected and allow microphone and
speaker permissions.
Conclusion:
We hope this article has been helpful. These same steps can
also be used with an official SSL certificate and a fully qualified domain
name. For professional support, please contact Swanand at Skype:
swanand.anand.awatade.
Soratemplates is a blogger resources site is a provider of high quality blogger template with premium looking layout and robust design
0 comments:
Post a Comment