Google Drive lets you share files with specific contacts or you can make them public and anyone can then view your files. Sharing also prevents you from clogging someone else’s mailbox. For instance, if you are sending a large file as an email attachment, a better option would be that you upload the file to Google Drive and share the link instead.
Who Can View or Edit your Shared Files?
If you have been using the sharing feature of Google Docs (now Google Drive) for some time, you may have quite a few files in the Drive that are accessible to other users. Would you like to review this list?
Here’s a simple Google script that will scan your Google Drive and prepare a list all files that have been shared from your Google Drive.
To get started, click here to copy the Google Script in your own Google Drive. Then choose Run->Start to execute the Google Script. The script will ask for authorization since it needs to check the sharing permissions of the file in your Google Drive. Say “authorize” and you’ll soon get an email with a list of all the shared files that were found in your Google Drive.
The report, see the above screenshot, will have links to the shared files and also a list of users who can view or edit that particular file. If a file can be viewed by anyone, the user will be mentioned as Public.
The Google Script checks the sharing permissions of every single file in your Google Drive and thus it may take a minute or two to finish if you have too many files in the Drive.
Bonus tip: Did you know that you can set an auto-expiry date for your shared links in Google Drive. The shared link will automatically stop working after a certain date or time set by you.
Set Auto-Expiry Dates for Shared Folders in Google Drive
Create a Public Folder Where Anyone Can Add Files
How Guest Can Upload Files to Your Google Docs
Keeping an Eye on your Shared Windows Folders
Drag and Drop to Quickly Share Files from your Desktop
A New Way to Publish your Shared Folders on the Web
Apple has recently rolled out iOS 7.0.3 software update for the compatible devices containing several notable improvements and bug fixes. Besides, the company has also released the latest desktop operating system, OS X Mavericks, which carries more than 200 new features.
In both the updates, Apple has introduced a new feature called, iCloud Keychain, which keep user's passwords and credit card information in sync across other iOS devices and it also includes a password generator that helps to create more secure passwords. The iCloud Keychain feature can be found in Settings of the iPhone or iPad and the Mac App Store on a compatible Mac.
The iCloud Keycahin is a password syncing and storage service that works on Safari in iOS and OS X Mavericks. It includes the ability to create a strong password which is stored and synced to user's all other iOS and Mac devices. Additionally, this service can also store user's credit card information, although users will need to enter the credit card security code manually. It should be noted that iCloud Keychain works only in Safari on Mac.
Those iOS users, who wish to set up iCloud Keychain on iOS 7 and OS X Mavericks, may follow our step-by-step guide.
IBTimes UK reminds its readers that it will not be held liable for any damage to the device.
Steps to set up iCloud Keychain on iOS 7 and OS X Mavericks
Step-1: When the OS X 10.9 Mavericks upgrade is being installed, it will prompt users to setup iCloud Keychain and create a security key and linking devices to iCloud Keychain
Step-2: This can also be done by going to iCloud settings on the Mac and turning Keychain on. After iCloud Keychain is turned on, users will need to enter their password and security code on other devices to add them to iCloud Keychain. Or, users can tell Apple to ask their approval on another device
Step-3: Mavericks will push a notification when a device requests access
Step-4: When the iOS 7.0.3 update is completed (on iPhone or iPad) navigate to Settings>> iCloud>> Keychain>> On to turn the settings on. User can now enter the security code and a key sent to the phone or use other device to approve iCloud Keychain
Step-5: The iCloud Keychain settings and saved passwords should be in the Safari settings. Head over to Settings>> Safari>> Password & Autofill to see the saved passwords and credit cards.
Note: From here users can also delete passwords and add credit cards to iCloud Keychain.
Step-6: The password generator is only available on Safari for OS X Mavericks currently and will not work on other sites as some prevent passwords from being saved. The generated passwords will sync between devices and can be found on the desktop at Safari>> Preferences>> Password, where uses can edit or remove passwords and access settings.
Before Lion (OS X 10.7) debuted in 2011, installing the latest major version of Mac OS X meant buying a disc and slipping it into your Mac’s optical drive. But Lion changed all that by making OS X available for direct download, and Mountain Lion (OS X 10.8) and Mavericks (OS X 10.9) have inherited this distribution method. More specifically, the latest version of OS X is available only as a download from Apple’s Mac App Store—and this time around, it’sfree. This makes it easier and more convenient to upgrade your OS than having to buy and use a DVD or thumb drive, but it also raises a number of questions, and it presents upgrade obstacles for some users. As I’ve done the past few years, I’ve compiled this guide to getting and installing Apple’s latest OS.
Before proceeding, be sure to read my article on getting your Mac ready for Mavericks, which covers system requirements and recommendations, as well as a number of tasks you should perform before upgrading in order to help the process go smoothly.
Fair warning: If you install Mavericks right when it’s released, keep in mind that you’re installing version 1.0 of a major new OS. It could be bug-free, but if the history of OS X is any indication, we’ll see the first update, containing a number of bug fixes, within a few weeks. If downtime isn’t an option for you, you might consider holding off for the inevitable OS X 10.9.1.
Downloading Mavericks
Assuming your Mac meets the requirements, getting Mavericks is easy—for most people (more on that below). You simply launch the Mac App Store application, click the OS X Mavericks banner on the store’s main page (or search for Mavericks, or click this direct link), click the Free Upgrade button at the top of the screen, and then click the Install App button that appears.
After you provide your Apple ID and password, Mavericks will begin downloading. Specifically, the 5.3GB installer application, called Install OS X Mavericks.app, will be saved to your main Applications folder (/Applications) and, if you’re upgrading from Mountain Lion or Lion, added to Launchpad. The installer will likely even automatically launch after it finishes downloading. On my cable-model connection the day of Mavericks's release, the download took 28 minutes.
Note that as with Mountain Lion, updates to Mavericks will be provided through the Mac App Store app. In fact, if you choose Software Update from the Apple Menu under Mavericks, the Mac App Store app launches. (In Lion and earlier versions of OS X, that Apple Menu command instead launched the older Software Update utility.)
Downloading the installer onto other Macs: Once you’ve downloaded Mavericks to one of your Macs, you can download the installer to any of your other 10.9-capable Macs by simply logging in to your Mac App Store account, finding Mavericks in your Purchases list, and clicking the Download button to the right. (Just like applications purchased from the store, a single “purchase” of Mavericks lets you install it on all your personal Macs.)
Copying the Mavericks installer onto other Macs: Alternatively, once you’ve downloaded the Mavericks installer to one computer, you can copy it—over your local network or by using a flash drive, external hard drive, or other media—to your other Macs. This is obviously a much faster approach than re-downloading the 5.3GB installer to each computer. You won’t even be prompted to authorize the installer on each Mac, as you are with other Mac App Store-distributed software—the Mavericks installer does not use digital-rights management (DRM).
Downloading the installer onto a Mac already running Mavericks: If you already have Mavericks—either the official release or the golden master (the final developer release, a.k.a., the GM)—installed on a Mac, you may have problems downloading the final-version installer onto that Mac. The Mac App Store app may think you already have the installer and, thus, not offer to let you download it again. (This was a common issue with Lion, although much less so with Mountain Lion and Mavericks, but I mention it here just in case.) If this happens to you, launch the Mac App Store app and Option+click the Purchases tab in the toolbar; that should show the Download button next to Mavericks in the Purchases list. If that doesn’t work, Option+click Mavericks in the list and then Option+click the Installed button on the Mavericks page. One of these two methods should let you download the installer.
Similarly, if you're a developer who previously downloaded the golden master (GM) of the Mountain Lion installer, the Mac App Store app may claim that Mavericks is already installed on your Mac—and thus not let you download the official release—if the Mac App Store app detects the GM installer on any connected volume. (Again, this happened frequently with the Lion installer, but less so with Mountain Lion and Mavericks.) If this happens to you, the solution is either to delete the GM installer (after compressing it or copying it to a removable drive if you want to keep it handy) or, if possible, to disconnect the drive on which the GM resides.
Keeping the installer on hand
Before proceeding with installation, here’s an important tip: If you run the installer from its default location in the Applications folder, the installation process deletes the installer, presumably to free up the 5.3GB of drive space it occupies. So if, as explained above, you plan to use the installer on other Macs, if you want to create a bootable installer drive, or if you just want to keep the installer on hand, before installing, you should copy the installer to another drive—or at least move it out of the Applications folder.
Installing Mavericks
Unlike versions of OS X prior to Lion (OS X 10.7), Mavericks offers only a single installation option: where to install the new OS. In fact, you don’t need to make any decisions until it’s time to set things up and start using your Mac. You don’t even need to boot from a different disc or volume—the Mavericks installer runs as a standard application.
Once you’ve downloaded the Mavericks installer, here are the simple steps involved in installing the new OS:
Double-click the Install OS X Mavericks app; in the window that appears, click Continue, and then click Agree (twice) to agree to the Mavericks software license.
On the next screen, you choose where to install the OS. By default, only your internal startup drive is listed; if you have other drives connected and want to install Mavericks onto one of them, click the Show All Disks button and then choose the desired drive. Note that the installer lets you choose any drive that has OS X 10.6.8 or later installed or any blank drive. (The latter is what you would choose if you wanted to do a “clean” install that contains none of your data, applications, or settings from your current installation of OS X.) Of course, the destination drive must also be formatted as Mac OS Extended (Journaled) and use a GUID Partition Table; the built-in drive on any Mac eligible to run Mavericks should meet these requirements. (See my article on clean-installing Mavericks to help you decide if it's something you want to do. Also, we have instructions for installing Mavericks over Leopard (OS X 10.5), assuming you have the right to do so.)
Click Install, and then provide an admin-level username and password when prompted.
The installer spends some time preparing for installation. Over my many test installations on a number of different Mac models, this process rarely took more than a couple minutes, and on newer Macs took as little as 20 seconds. A message in the installer window explains that your computer will restart automatically; you can continue to work in other applications during this time, but once the preparation phase is finished, you get only a 30-second warning, and then your Mac will indeed restart on its own.
After your Mac restarts, the actual installation occurs. (If you’re upgrading from Lion or Mountain Lion, and you have FileVault 2 enabled, you’ll need to provide an authorized username and password to bypass the FileVault lock screen at startup. Once you do, installation will continue normally.) During my test installs, the installation took anywhere from 15 to 74 minutes, depending on the Mac.
When installation finishes, your Mac automatically restarts to complete the installation process. On my Macs, this final phase took roughly five to ten minutes. Once it finishes, your Mac proceeds to boot into Mavericks.
That’s the entire installation process—as with the Lion and Mountain Lion installers, you don’t need to choose between various kinds of installs, pick from a list of language translations or printer drivers, or make other potentially confusing choices that may or may not affect how your Mac functions.
That’s not to say that there’s nothing else to do, however. Your Mac will next go through the initial-setup process, and there are few tasks you’ll want to perform when you boot into Mavericks for the first time.
Initial setup: Accounts, Apple IDs, and iCloud
When the installation procedure finishes, what you see depends on whether you’ve installed Mavericks on an empty drive; or on a drive containing Mountain Lion, Lion, or Snow Leopard with existing accounts, settings, and data.
Mountain Lion: If you’ve upgraded from Mountain Lion (or installed Mavericks onto a blank drive and imported your data and settings from a Mountain Lion installation), the first thing you’ll see when you log in to your account under Mavericks depends on whether or not you were already using iCloud under Mountain Lion. If you were, you're prompted to enter the password for your Apple ID. If you weren’t, you're first prompted to provide an Apple ID or password; if you don’t have one, you have the option to create an Apple ID. Once you’re signed in, OS X asks if you want to use Find My Mac for this Mac, and then you’re prompted to agree to Apple’s terms and conditions (for OS X, privacy policy, iCloud, and Game Center). Click Agree (twice), and setup continues. (Whether or not you were set up to use iCloud under Mountain Lion, the first Apple ID screen gives you the option, via a tiny text link, to use different Apple IDs for iCloud and iTunes, if you don’t use the same account for both.)
In either case, the final step is to decide if you want to set up Mavericks’s new iCloud Keychain feature. Assuming you do, you’ll be walked through the setup process. Once that task is complete, you should be able to get right to work with no further interruptions.
Lion: If you’ve upgraded from Lion (or installed Mavericks onto a blank drive and imported your Lion data and settings), the procedure is essentially the same as with Mountain Lion. Oddly, on one of our Lion-equipped test Macs, we weren't prompted on the first restart to provide our Apple ID; it was only on the second restart that we were prompted. I suspect this was simply a glitch.
Snow Leopard: If you’ve upgraded from Snow Leopard (or installed Mavericks onto a blank drive and imported your Snow Leopard data and settings), the first thing you’ll see when you log in to your account under Mavericks is an Apple ID screen. Enter your Apple ID and password—you can create an Apple ID here if you don’t have one. (You have the option, via a tiny text link on this screen, to use different Apple IDs for iCloud and iTunes, if you don’t use the same account for both.) Once you’re signed in, OS X asks if you want to use Find My Mac for this Mac, and then you’re prompted to agree to Apple’s terms and conditions (for OS X, privacy policy, iCloud, and Game Center). Click Agree (twice), and you can start using Mavericks.
Empty drive: If you installed Mavericks onto a blank drive, your Mac will automatically restart with that drive as the startup drive. You’ll then be walked through the new-system setup procedure. First you choose a system language and keyboard layout. Next, you choose a Wi-Fi network and provide the network password. (If you're connected to an Ethernet network, you skip this step.) You’re then asked if you want to transfer accounts and data from another Mac, a Time Machine backup, another startup drive (such as a bootable clone backup), or a Windows PC; or you can simply start from scratch. If you do choose to transfer data, you’ll be given the option to choose what to transfer—most likely, you’ll want to transfer everything. The setup procedure will then continue much as if you upgraded from Mountain Lion, Lion, or Snow Leopard, respectively.
If you choose not to transfer data—so you’re essentially starting fresh—you’ll be asked to enter your Apple ID and password; if you don’t have one, you have the option to create an Apple ID. (If you use a separate Apple ID for iCloud and iTunes, you can click the little link here to enter them separately.) Once you’re signed in, OS X asks if you want to use Find My Mac for this Mac. You’re then prompted to agree to Apple’s terms and conditions (for OS X, privacy policy, iCloud, and Game Center); click Agree twice to continue. You then need to create a user account and password, configure a few options for that account, choose your time zone, and choose whether or not to allow OS X to automatically set the time. The final step is to decide if you want to set up Mavericks’s new iCloud Keychain feature. Assuming you do, you’ll be walked through the setup process. Once that task is complete, you're asked if you want to register your Mac, and after a brief Setting Up Your Mac screen, you can get to work.
Initial setup: Warnings and alerts
Incompatible software warning: If you upgraded a Snow Leopard, Lion, or Mountain Lion Mac, the first time you boot into Mavericks you may see a dialog box informing you that some of the existing software on your Mac is incompatible with the new OS, and listing that software. (Apple provides more information about such software in a support article.) You’ll usually see this message if you had kernel extensions—low-level software that patches the operating system itself—installed under your previous OS X installation that Apple specifically knows won’t work with Mavericks. It’s also possible to see the incompatible-software dialog box if you installed Mavericks onto a blank drive and then transferred data from another Mac or drive, but it’s less likely—OS X’s Migration Assistant generally doesn’t import kernel extensions and similar software responsible for low-level processes. In either case, OS X automatically moves this incompatible software to a folder called Incompatible Software at the root level of your startup drive.
Access prompts: If you have any apps or menu extras that launch at login that require access to your calendars, reminders, or contacts—for example, a third-party calendar app—the first time you log in under Mavericks, you're prompted to approve that access. (In versions of OS X prior to Mavericks, apps could access this data without needing your explicit approval.) Click OK to approve, or Don't Allow to decline.
Similarly, if you use any third-party utilities that take advantage of OS X's Assistive Devices features to, say, control windows or automate tasks, the first time you launch those utilities, each will prompt you to approve this access in the Accessibility screen of System Preferences' Security & Privacy pane. To allow access, check the box next to each app in the list here. (If a utility hasn't yet been updated for Mavericks, it may prompt you to instead open the Accessibility preference pane, and it may even open that pane for you. You'll need to switch to the Security & Privacy pane, instead.)
What’s New?: Finally, the first time you boot into Mavericks, you'll notice a Notification Center alert offering to show you some of OS X 10.9's new features. Click Show to take the tour in your Web browser. (If you don't want to take the tour now, you can always take it later by choosing What's New In OS X Mavericks from the Finder's Help menu.)
Post-Mavericks tasks
Once you’re up and running in Mavericks, you’re almost done. You may find, despite your pre-installation checks, that some of your existing software needs updates. Similarly, if you’ve performed a “clean” install of Mavericks (onto a blank drive without transferring accounts and data), you’ll need to spend a bit of time setting things up, and you'll want to reinstall all your favorite apps.
Check (again) for updates: The first thing you’ll want to do is choose Software Update (from the Apple menu) to open the Mac App Store app and install any pending OS updates. If you’ve installed Mavericks in the first few days of availability, chances are you won’t have any updates waiting (especially if you checked for updates to Mountain Lion, Lion, or Snow Leopard immediately before upgrading, so you already have the latest updates to other Apple software), but it can’t hurt to be sure. And if you’ve waited a week or more to install Mavericks, there’s a good chance Apple will have released a minor update—or will sometime soon.
Even if no updates to Mavericks itself are available, you may find that, after installing OS X 10.9, a firmware update is available for your Mac. For example, when Mountain Lion was released last year, Mac laptops required a firmware update to support Mountain Lion’s Power Nap feature, and this firmware update appeared only afterinstalling Mountain Lion (presumably because the firmware update wasn’t necessary under Lion or Snow Leopard).
Set up printers, if necessary: If you didn’t upgrade from an already-configured installation of Mountain Lion, Lion, or Snow Leopard, you’ll want to set up your printer(s). As with OS X 10.8, 10.7, and 10.6, Mavericks doesn’t include many printer drivers in its base installation. Rather, when you set up a printer, the OS determines which drivers you need and, if necessary, either downloads them automatically or helps you get them. Open the Printers & Scanners pane of System Preferences and click the Add (+) button, and you’ll see a list of connected and nearby (Bonjour) printers. Choose one, and OS X will see if drivers are available. If your Mac already has the drivers installed, OS X will set it up immediately; if you don’t yet have the drivers, you see a message that you can download the software and add the printer.
Check for incompatible software and, if necessary, install apps: Next, if you saw the aforementioned incompatible-software dialog, now’s a good time to check the contents of the Incompatible Software folder at the root level of your startup drive, and then check each vendor’s website for updated versions of that software. Similarly, if you performed a clean install (installed Mavericks onto a blank drive and didn’t transfer accounts, applications, and data), it's time to reinstall your apps. Just make sure you’ve got the latest versions, as well as the latest updates (from vendor websites) to software you install from CDs and DVDs.
Note that, as with Mountain Lion, the first time you try to load a webpage or run an app that requires Java, Mavericks will prompt you to download and install the Java runtime, even if you already had Java installed under the previous version of OS X. This is normal—you shouldn’t worry that installing Mavericks somehow “lost” any of your data or apps.
Enable FileVault: If you want to use FileVault, OS X’s disk-encryption feature, but it’s not enabled—either because you’ve never used it or because you upgraded from Snow Leopard and followed my advice to disable it before upgrading—now’s the time to turn it on, via the Security & Privacy pane of System Preferences. Note that if the Mavericks installer (or the Mountain Lion or Lion installer before it) was not able tocreate a Recovery HD partition on your drive, you won't be able to enable FileVault.
Upgrade and installation challenges
For most people, Mavericks—like the two versions of OS X before it—is easy enough to get and easy to install. But, also as with Mountain Lion and Lion, upgrading to OS X 10.9 presents challenges for a few groups of people.
People with Mavericks-compatible Macs who are still using Leopard (OS X 10.5): There are a few Mac models that originally shipped with OS X 10.5 and are compatible with Mavericks. I’m certain there are a good number of those Macs still running Leopard, and many of them will likely stay that way—if someone has been happily running 10.5 for five or six years, and never felt the need to install OS X 10.6, 10.7, or 10.8, I doubt they’ll be running out to install OS X 10.9.
That said, what if you’re one of the people who’s still using Leopard, and you’ve finally been convinced to upgrade? Or what if you want to start fresh by installing Leopard and then upgrading to Mavericks? Can you jump directly from 10.5 to 10.9? Apple’s official policy is that you need to purchase and install Snow Leopard (currently $20 for a single-user license or $30 for a family pack) and then upgrade to Mavericks.
Indeed, the Mavericks installer is strict about requiring OS X 10.6.8: The installer application itself will launch under Leopard, but it won’t let you install Mavericks, either over Leopard or onto a bare drive. Nor can you mount a Leopard drive on a Mac running Snow Leopard, Lion, or Mountain Lion and then install 10.9—the installer simply refuses to install over Leopard.
But what if you own a copy of Snow Leopard for the Mac in question, but you don’t want to add an hour or two to the installation process by installing Snow Leopard first? We’ve published the instructions for installing Mavericks over Leopard. It’s not a simple procedure, but it works.
People with slow or limited-bandwidth Internet connections: If your Internet connection is slow, it will take a long time—perhaps days—to download the 5.3GB Mavericks installer. Even worse, if your ISP enforces caps on your Internet-data usage, you could end up paying a hefty price for the privilege.
If you’ve got a Mac laptop, you can instead tote it to your favorite Apple retailer, the library, a friend’s house, or the office—anywhere with a fast Internet connection—and download the installer there. In fact, for the past couple OS X releases (Mountain Lion and Lion), Apple’s official policy was to invite you to your local Apple Store and use the store’s Internet connection to download the installer; store employees would even walk you through the purchase, download, and installation processes. I suspect that will continue to be the case with Mavericks.
Of course, if your Mac doesn’t happen to be portable, or if you live in an area where you can’t borrow a fast, cheap Internet connection, you'll need to find another solution. If you’ve got an Apple Store nearby, you may be able to take a portable hard drive or an 8GB-or-larger thumb drive to the store and ask to purchase and download the installer on one of the store’s Macs. Similarly, you could borrow a friend’s computer, or—if you’re lucky enough to have a Mac at the office—use your work computer to download Mavericks.
(When Lion was released, Apple made available a $69 bootable flash drive containing the Lion installer. Unfortunately, the company didn’t do the same for Mountain Lion last year, and I don’t expect Apple to provide such an option for Mavericks, either.)
Businesses, schools, and other organizations and institutions that need to install Mavericks on many different computers: When Lion (the first version version of OS X to be download-only) was released, we heard concerns from large installations—schools, businesses, and the like—about the Mac App Store-only distribution. These organizations often need to roll out new versions of OS X to many Macs, and forcing each user to download and install Lion presented significant technical, logistical, and support issues. Mavericks presents the same challenges. Apple’s volume licensing information webpage explains the options: Organizations will use the same purchasing procedure as always to buy OS X, but they’ll be given one Mavericks redemption code for each purchase contract. After using that code to download the Mavericks installer from the Mac App Store, that copy of the installer can be used on any and all Macs covered by the contract.
To do so, Apple says customers can copy the OS X installer to the /Applicationsfolder on each Mac and then run the installer from there, or they can create a NetInstall or NetRestore image, or use Apple Remote Desktop.
While researching this series of articles, I installed many, many copies of OS X 10.9 on a variety of Macs. As with Mountain Lion and Lion, my experience has been that for the typical Mac user with a broadband connection, the process of purchasing, obtaining, and installing OS X continues to be easy and pain-free. Still, heeding the advice above will reduce the chances of problems and make the upgrade go as smoothly as possible. Once you’re up and running, check out all our articles about the new OS, which cover its features, built-in apps, and more.
(For an even more in-depth look at upgrading to Mavericks, check out Macworldsenior contributor Joe Kissell’s Take Control of Upgrading to Mavericks, which covers such topics as extensive pre-install diagnostics, clean installs, installation troubleshooting, and much more. And see our complete installation guide for how-tos on using OS X Recovery, creating a bootable install drive, performing a clean install, and installing Mavericks over Leopard.)
Blackberry is once again trying to release BBM for iOS and Android, after a leaked version of the app forced the company to pause its rollout.
In a blog post, Blackberry says the app will show up on Google Play and the iOS App Store within the next few hours. You can also visit BBM.com from an iPhone or Android device to get the download link.
Eager users may still have to wait a while before they can actually start sending and receiving messages. To deal with demand, Blackberry says it's implementing a line-up system, and users must enter an e-mail address to reserve a spot in line after installing the app. Anyone who signed up in advance at BBM.com won't have to wait in line.
BBM, short for Blackberry Messenger, was once an exclusive feature for Blackberry phones, allowing users to send messages amongst themselves without counting against their texting plans
Users could see when their messages were received and when the recipient was typing back, which helped to make Blackberry phones famously addictive.
In recent years, other apps such as WhatsApp and Viber have provided similar features across platforms, while Apple's iMessage is a BBM-like service for iOS and OS X users. Blackberry is likely feeling the pressure to expand BBM as the company's plans for a smartphone resurgence slip away.
Unfortunately for Blackberry, the initial launch didn't go smoothly. An Android version of the app leaked online before Blackberry could officially launch it, and the demandwreaked havoc on Blackberry's servers .
The line system sounds similar to the one used by the popular iOS app Mailbox, which launched to great fanfare earlier this year. The wait for Mailbox lasted days or even weeks for some users. Hopefully BBM users won't have to wait so long. Blackberry says it is “focused on moving millions of customers through the line as fast as possible.”
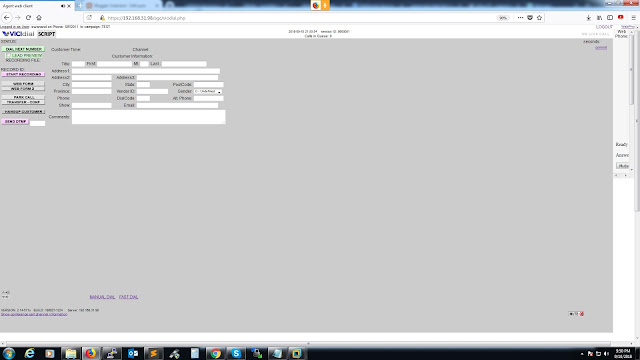
You can churn list with disposition in vicidial / Goautodial through back end with such command....
mysql -p
use asterisk;
update vicidial_list set status='NEW',called_since_last_reset='N' where list_id='104'and status='A';
only need to change list id and status, through this command you can churn a particular disposition. For multiple list id and status update vicidial_list set status='NEW',called_since_last_reset='N' where list_id in ('104','105','133') and status in ('A','NA')
know of only three ways to completely and permanently destroy a message in Gmail:
Mark the message as spam, then empty the Spam folder.
Delete the message, then go to Trash and delete it again.
Delete the message, then wait 30 days, after which Gmail will automatically erase it.
In other words, chances are that you simply misplaced the messages, moving them to another label by mistake. If that's the case, finding them shouldn't be too difficult. (Remember that in Gmail, a label acts much like a folder in other programs, except that you can assign multiple labels to any message or conversation. See How to manage Gmail labels for details.)
To find a lost message, search for a word or words that will be in that message, and hopefully not in too many others. The search results are sorted by date, so finding the right one shouldn't be too difficult.
But if you can't find the message, look at the bottom of the list. If you see the words "Deleted messages match your search," click the View them link.
If that doesn't work, check your Spam section.
Of course, it's possible that you could have deleted them for good, in one of the three ways I describe above. Those accidents may not be likely, but they're certainly possible.
In that case, you may have no alternative except contacting the person who sent you the email (or who you sent it to) and ask for a copy.
There's no such thing as perfect security. Someone with sufficient time and money, and a strong enough motive, can crack anything.
So the real question becomes: Is your encryption secure enough. And the answer is: If your encryption software uses a recognized and respected standard such as AES or Blowfish, and you use strong passwords and take other precautions, it almost certainly is.
Given enough time or processing power, any password can be cracked through a brute force attack--where a program throws words and random character strings at an encrypted file until it stumbles upon the right password. But with a sufficiently strong password, the time and processing power required is just not practical.
To get an idea of how quickly a password can be cracked, check out How Secure is My Password? When I tried the wordpassword, the web site told me that a conventional PC could crack it "almost instantly." On the other hand, if I used a random string of eight lowercase letters, my files would be safe for all of 52 seconds. But a string of 18 characters, including digits, punctuation, and upper- and lowercase letters, would remain safe for "3 quintillion years." I think that's sufficient--even assuming the use of hardware more powerful than a single PC.
But back up your strong passwords with other good habits. Always be suspicious about possible scams. Keep your security software up to date. Never share a password with anyone with whom you wouldn't share a credit card account. And if a Web site offers two-step verification, use it.
When you come right down to it, your security system doesn't have to be 100-percent impenetrable. It just needs to be harder to crack that most other, equally-tempting targets.
Gmail labels behave very much like folders in other digital environments. You can store messages and conversations in them to organize your mail. And they're hierarchical--you can put one label inside another. For instance, I keep an Answer Line label, and inside that I have labels for newly-arrived reader questions, questions I've put aside for possible use in the blog, and reader comments.
Google doesn't called them folders because you can attach multiple labels to a single message. Imagine you're dealing with paper instead of electronic messages. You can put a sheet of paper into a folder, then pull it out and put it in another folder, but you can't keep it in both folders at the same time. Yet you can stick two or four or 18 labels onto that sheet of paper. Add the kind of search capabilities you don't get with paper, and you can see the advantages..
You've got three ways to assign a label to a message:
If you select or open a message, you'll see a label icon near the top of the Gmail window. To assign a label to a message, click that icon, select one or more labels from the pull-down, then click Apply at the bottom of the menu.
You can also move a message to another label--which feels like pulling it out of one folder and putting it in another. That's why you move a message by clicking the folder icon to the immediate left of the label icon.
You can also move a message by dragging it to a label in the left column.
To create a new label, click either of the two icons discussed above, and selectCreate new.
Gmail offers two ways to make other changes to labels, such as renaming them, deleting them, and so on:
Click either of the discussed icons discussed above. The last item on the pull-down menu will be Manage labels. This brings you to a full-page label-editing environment.
Point to a label in the left column, but don't click. A down arrow icon will appear to the right. Click it for a menu of editing options.
The Web is a wild place, with more than the NSA potentially out to get you. With the so-called six strikes antipiracy initiative in full effect, you never know if Hollywood is monitoring your peer-to-peer activity. Then there are the malicious hackers trying to reset email, Facebook, and Twitter passwords.
No security regimen short of complete hermitage can keep you 100 percent secure. Nevertheless, you can take a few simple precautions to maintain your privacy online and deter all but the most determined bad guys.
VPNs serve as an encrypted tunnel that prevents bad guys from getting between you and the Internet in order to steal your login credentials or other sensitive information.
That’s a great reason to use a VPN, but it’s not the only one. Maybe you don’t want your Internet service provider to monitor your online activity at home. Normally when you connect online, your ISP can observe all of your activity. Over a VPN, however, your ISP can see only your connection to the VPN. As a bonus, many VPNs can help you bypass region blocks for sites like Amazon, Hulu, Netflix, and BBC’s iPlayer.
Not all service providers are created equal, however. Some VPN services log all of your browsing activity, thereby negating the point of using a VPN for privacy.
One solid VPN choice is Sweden-based IPredator, an $8/month service with ties to the infamous torrent-tracking site The Pirate Bay. That association may give you pause, but anonymity is clearly top-of-mind for the service. IPredator claims never to log any user traffic data, and you can even use PGP encryption when emailing IPredator support.
Another popular choice in privacy-enthusiast circles is Private Internet Access, which similarly claims not to log any of your traffic. PIA is priced at $7 per month, or you can buy an entire year’s subscription for $40. PIA can help you beat region blocking in the United States, Canada, the U.K., and several countries in continental Europe.
Though VPNs are great for privacy, the ones I recommend here won’t prevent the companies behind destination websites like Facebook and Google from logging your browsing activity. Using your browser’s incognito mode won’t keep you completely anonymous, either, but it will block websites from reading the cookies and history stored in your browser to learn more about you.
Stop leaving private data in the cloud
Online file-syncing services such as Dropbox, Google Drive, and SkyDrive are among the best innovations to grace the Internet. But while the convenience of viewing your latest photos on Dropbox or of pulling text documents from iCloud may be fantastic, much of your data sits on company servers either unencrypted or protected with a layer of encryption beyond your control.
That means your data is available to law enforcement officials who obtain the right paperwork, regardless of how little objective justification they have for looking at your stuff. And any well-informed hacker can break into your account by using social engineering techniques, by discovering weaknesses in a company’s server security, or by conducting a brute-force attack that tries to guess your password.
For sensitive data that you need to sync across devices, a better alternative is to use an encrypted cloud storage service. You can build one yourself by encrypting data on your PCbefore sending it to Dropbox, using free software such as BoxCryptor or the open-sourceTrueCrypt.
A far simpler method, however, is to find a file-syncing service that offers built-in storage encryption.
Two popular encrypted storage services are SpiderOak and Wuala (pronounced like voilĂ ). Both services bill themselves as “zero-knowledge solutions,” meaning that they don’t know what you’re storing on their servers—and that they have almost no way of knowing, even if they wanted to. When you use SpiderOak, for example, the password you choose is factored into the encryption keys generated by the SpiderOak client. The only way for anyone, even a SpiderOak employee, to access your files—short of a quantum computer or a lucky guess—is by inputting your password. Password-building best practices dictate you should choose a phrase of at least ten characters that consists of an assortment of letters, numbers, and symbols.
The downside of services like SpiderOak and Wuala is that if you forget your password, you’re pretty much out of luck. Both companies say they have no way of retrieving your password and can provide only a password hint that you entered during the signup process.
Despite the tight standard security, you can access your data on both services in a less secure way. If you log into your SpiderOak account from the company’s website or from a mobile device, your password gets stored in encrypted memory for the duration of your session. This is the only situation, SpiderOak says, where your data might be read by someone with access to its servers. For maximum privacy, you should access your files only via the SpiderOak desktop client.
Wuala claims to encrypt and decrypt your data on a mobile device similar to the way it handles the task on your PC. But when you share folders from Wuala using a Web link, the encryption key gets included in the URL. So anyone who receives the URL can view the contents of that folder, and the key has to be sent to Wuala’s servers for decryption. Wuala claims its service “forgets” the key after decryption, but that’s still one instance where using Wuala is less secure.
SpiderOak, based in Illinois, offers 2GB of free online storage, which should be enough for the mission-critical documents you need to sync across devices. If your storage needs are larger, try Switzerland-based Wuala, which offers 5GB free.
Both services provide back-up and Dropbox-like functionality. SpiderOak’s Hive sync sits on your PC as a special folder, while Wuala syncs to your PC as a network drive.
As is true of any online secure service, you have to be comfortable with the company and trust that the service is doing what it claims it is to keep your data secure.
Secure your online services with two-factor authentication
The first line of defense for keeping your online services secure is to use unique, random, passwords of ten characters or more for every account you have—just don’t forget to store them in a good password manager. For even better security, turn on two-factor authentication for Google, Facebook, and every other service that offers it.
Two-factor authentication requires you to enter a short numeric code in addition to your password before you can gain access to your account. The code usually comes from a physical fob or from a smartphone application. The good news is that you can get most of your two-factor authentication codes from Google’s Authenticator app for Android and iOS.
Authenticator automatically works with accounts such as Dropbox, Evernote, Google, LastPass, and Microsoft. Facebook offers its own code generator inside the social network’s mobile app, but you can add Facebook to Authenticator as well. From the Facebook newsfeed, click the settings cog in the upper right corner and select Account Settings.
On the next page, click Security in the left-hand navigation column. Under ‘Security Settings’ look for the ‘Code Generator’ menu option and click Edit to the far right of that option.
Click the link in the first two words of the sentence Set up another way to get security codes.
A QR code should appear in a pop-up window. Open Authenticator, navigate to the ‘Add Entry’ option, select Scan Barcode, and point your phone’s camera at the QR code on your monitor. In a few seconds, your phone will identify your Facebook account code and add it to Authenticator. Enter a Facebook code from Authenticator to ensure that everything’s working properly, and you’re done.
Two-factor authentication isn’t foolproof, but it does add a hurdle to help deter anyone who wants to get into your account. Twitter offers its own two-factor authentication, but its method is not compatible with Google’s Authenticator. The last time we checked, Twitter’s authentication method still had some kinks to work out.
If two-factor authentication isn’t enough security for you, take stock of the backup email address you use for all of your online accounts. Consider using one or several unique email addresses as password recovery addresses. Just make sure that you never give out these email addresses for personal mail and that they aren’t similar to your other accounts.
VPNs, encrypted storage, and two-factor authentication are great tools for keeping your data secure and your online activity as private as possible. They may sometimes be a bit of a pain to work with—especially when you’re entering extra codes in Authenticator. But dealing with a minor headache now is a lot easier than enduring the major migraine you’ll feel if you let yourself get hacked when you could have stopped the bad guys in their tracks.