##Google Analz## ##Microsoft## ##Googel## Swanand: January 2014

Tuesday, 21 January 2014

Fix Store App in Windows 8.1

  • Sometimes, after upgrading to Windows 8.1, the Store App may not start.
  • It might still show the number of available updates on the Live Tile.
  • Starting the app may show a progress ring but it may not finish loading.

  • To fix this, run the following in a Command Window (CMD) to re-register the Store App:
powershell -ExecutionPolicy Unrestricted Add-AppxPackage -DisableDevelopmentMode -Register $Env:SystemRoot\WinStore\AppxManifest.XML

  • If you get error 0x8007064A after executing this, it means that the registry key "HKEY_CURRENT_USER\Software\Classes\Local Settings\Software\Microsoft\Windows\CurrentVersion\AppModel\Repository\Packages" does not haveSYSTEM as the owner.
  • Change the owner back to SYSTEM as explained here and try again.

  • To fix three other system apps such as PC Settings, run the following:
powershell -ExecutionPolicy Unrestricted Add-AppxPackage -DisableDevelopmentMode -Register $Env:SystemRoot\camera\AppxManifest.xml
powershell -ExecutionPolicy Unrestricted Add-AppxPackage -DisableDevelopmentMode -Register $Env:SystemRoot\FileManager\AppxManifest.xml
powershell -ExecutionPolicy Unrestricted Add-AppxPackage -DisableDevelopmentMode -Register $Env:SystemRoot\ImmersiveControlPanel\AppxManifest.xml

Friday, 17 January 2014

Understanding Cain and Able - Complete Tutorial

DESCRIPTION
Cain & Abel is a password recovery tool for Microsoft Operating Systems. It allows easy recovery of various kinds of passwords by sniffing the network, cracking encrypted passwords using Dictionary & Brute-Force attacks, decoding scrambled passwords, revealing password boxes, uncovering cached passwords and analyzingrouting protocols. It also has ARP poisoning and spoofing capabilities, making it into anextremely powerful hacking or auditing tool. The ARP spoofing feature works in a similar way as described in the "ARP Spoofing" tutorial. Indeed it would be wise to read that tutorial before attempting to use Cain.
Environment
1. Install and run Cain. Immediately when it opens you can see the first disturbing scene. All the cached passwords are shown in the "Protected Storage" tab. These include passwords from IE, Outlook or other HTTP transactions.
Capture1.JPG

2. The "Network" tab is a scaled enumeration system, able of enumerating all Windows computers it can find on the local network.
Capture2.JPG
3.The most interesting (IMHO) feature of Cain is in the "Sniffer" Tab. Cain allows you to ARPSpoof, Sniff and Brute force passwords all via one interface. Notice that the "Sniffer Tab" has 5 sub-tabs- Hosts, APR, DNS Spoofer, Routing and Passwords.
Capture3.JPG
4. To start ARP Spoofing, you need to activate the sniffing daemon and the APR daemon. You do this by clicking on both the "Sniff" and "APR" buttons at the top of the window


5. Make sure you are in the "Sniffer" tab, and right click anywhere inside the tab. You should see a "Scan MAC addresses" option. Click it.
Capture4.JPG


6. Choose the appropriate IP range that suits your local network and click "Ok".
Capture5.JPG
7. A quick scan should occur, giving you all the MAC addresses present in that subnet.
Capture6.JPG
8. Once the scan is complete, move to the APR sub-tab at the bottom of the window.This is the window in which you choose the computers you want to attack. Now click on the blue "plus" sign at the top of the windows to add hosts to attack.


9. You should get the following screen:
Capture7.JPG
10. Now we wait for the attacked host to enter password data to services such as FTP, HTTP, POP3, IMAP, and lots of others. In the following screenshot, an FTP password was intercepted.
Capture8.JPG


11. We can see that the FTP session between 192.168.1.32 (Attacked Computer) and 194.90.1.6 (Netvision's FTP server) was router via our computer. Now click on the "Passwords"see the captured passwords.
Capture9.JPG
12. For encrypted passwords such as SMB (NTLM in it's various flavours) you can send the password to a Brute Force session.
Capture10.JPG
13. After sending the password to the cracker, click on the "Cracker" tab and start the required attack.
Capture11.JPG
This was a quick tutorial about Cain's ARP Spoofing ability. Apart from ARP Spoofing Cain can do lots of other wonderful things, just take time to *carefully* learn the application.
I will be posting more article on how we can use some of the popular tools that are available in the web world but first I will focus on the basics of it then move onto the use of tool . Hope you enjoyed the article.
Post your comments and suggestions to encourage me .

Thursday, 16 January 2014

How to block and replace a website on a PC.

How to block and replace a website on a PC.

My computer=> C drive => Windows=>System32=>drivers=>etc=> host file

Open host file in WordPad or notepad

Now open CMD and type in CMD ping www.google.com then copy the IP Address of Google website

In host file just write the IPaddress of Google website that you copy and name of the website which one you want to block.

Like:
87.248.112.181 www.facebook.com

in this case you will type in URL www.facebook.com but Google website will open.

for block:
type 127.0.0.1 www.facebook.com or www.yahoo.com

it’s not going to open which one you will type.

Hope you found it useful
------------------------------------------
How to unblock?
just delete that line from the file.

How To Identify Fake Facebook Accounts


How can you detect the Fake FB Profile. On these days we are getting so many friend request specially by girls, but there is no way to identify that account is fake or original. So don't worry we are going to tell you simple method to detect fake Facebook account.

So this is a Facebook account which named by Sarikha Agarwal. Now we need to verify this account real or fake, so our first step is going to the images.google.com and click on camera image.

    So when you click on search by image you will get popup like below image.

  Now go to that profile, right click on image and click on copy image URL

Now profile pic URL has copied.. now again go to images.google.com Tab and paste
imageURL
When you enter then you get related images search...
Now you can better see that this profile is real or fake..So here is a proof that this profile is fake. Enjoy the trick..

Be aware when you will going to add an beautiful or smart unknown person as your friend. So be checked first.. there are lot of fake profiles are create everyday. 
This person might be spy on your profile and steal personal information like your photos, etc for their hacking stuffs.. So Be Safe Online..

HOWTO : Adaptec Storage Manager on Ubuntu 64-bit Desktop

I have 2 Adaptec RAID cards 5805 and 2405 on two different server and desktop. Adaptec Storage Manager monitors the RAID remotely. You can even create and format the RAID remotely too. However, it cannot upgrade the firmware under Linux system.

Step 1 :

Download Adaptec Storage Manager. Go to the following site and select the latest version of Storage Manager. 5805 and 2405 are under Adaptec Unified Serial SAS/SATA. The current version at this writing is v6.50.18570 dated April 23, 2010.

http://www.adaptec.com/en-US/support/raid/#sas_raid

For 5805 :
http://www.adaptec.com/en-US/downloads/storage_manager/sm?productId=SAS-5805&dn=Adaptec+RAID+5805

For 2405 :
http://www.adaptec.com/en-US/downloads/storage_manager/sm?productId=SAS-2405&dn=Adaptec+RAID+2405

Let's take 5805 as example on 64-bit Ubuntu Desktop. Download link is as the following :

wget http://download.adaptec.com/raid/storage_manager/asm_linux_x64_v6_50_18570.tgz

Step 2 : 

tar -xzvf asm_linux_x64_v6_50_18570.tgz

cd manager

sudo apt-get install alien
alien --scripts StorMan-6.50.x86_64.rpm
sudo dpkg -i storman_6.50-18571_amd64.deb


Step 3 :

wget http://se.archive.ubuntu.com/ubuntu/pool/universe/g/gcc-3.3/libstdc++5_3.3.6-17ubuntu1_amd64.deb

sudo dpkg -i libstdc++5_3.3.6-17ubuntu1_amd64.deb

Step 4 :

To run the Storage Manager :

sudo /usr/StorMan/StorMan.sh

Login as Ubuntu Desktop user and password. The user manual of Storage Manager can be downloaded at :

http://www.adaptec.com/en-US/support/raid/sas_raid/SAS-5805/_docs/ASM_v6_50_18570_Users_Guide_for_DAS_pdf.htm?nc=/en-US/support/raid/sas_raid/SAS-5805/_docs/ASM_v6_50_18570_Users_Guide_for_DAS_pdf.htm

Remarks : if you want to monitor the server's RAID card in the same subnet, you must do the same steps on the desktop and server.

Done!

HOW TO HACK-PROOF YOUR WEBSITE, BASICS FOR NON-EXPERTS

Why Protect your Server?
SoR was hacked early 2009. Cleaning out the hack, figuring out why it happened, and hardening the SoR server to keep it from happening again wasted a full week of labor. It exposed visitors of my site to spam redirects and a trojan virus. It also potentially opened me up to full site deletion, password theft, database corruption, being blocked by search engines for malware distribution, and a host of more bad-ness I don’t want to clue hackers into.


I can never be 100% sure, but evidence leads to my server control panel that had a known security hole. From there, the hacker gained ftp access to my site, and then ran a whole list of bad scripts. Was it my fault? Well, there was a whole host of things I *should* have done since day one to harden my server that most likely would have blocked the hacker. This article is to share what I learned the hard way.
Now I know what you are thinking, because I thought it too: “I’m a noob at web security and don’t want to spend years studying web security to defend myself. My website is about [insert non-IT interest here], not IT related!” This website is about making robotics – I’d rather spend years studying robots, not defending myself against fat loser hackers who still live in their parents basement and can’t get a real job (rant rant rant).
So this page is how to defend yourself against 95% of all hacks on your site, and to help you protect yourself from your noobness.
Don’t Give Hackers a Target
A hacker can’t install evil CGI scripts on your server if your server doesn’t have CGI scripts enabled. Make sense? Turn off *everything* on your server that you don’t use, such as but not limited to:


php
ruby on rails
cgi
webmail (just use redirects to your gmail, etc.)
perl
asp
etc.

The other major advantage to turning everything off is that you don’t need to constantly make sure that each are fully patched and updated against the most recent exploits. Simply turn off and forget.
Keep Software Up-To-Date
This is fairly obvious – organizations [should] release updates to their software to patch against the latest exploits. These exploits are often made public around the same time. If a hacker sees you don’t have the latest version installed, he knows exactly how to exploit your server!

Now it’s not reasonable to check for updates *every day*, so there are other methods. Some software has ‘auto-update’ or ‘auto check for update’ features. Turn on ‘auto check for updates’, but be wary of ‘auto-update’ as you don’t want it to break anything without your knowledge. Also, sign up for any software mailing lists that notify users of newer versions . . . and pray they don’t spam you with promotions in the mean time.
Hide software version numbers from public facing pages if at all possible.
There are also automated methods to update your server, such as Yum andUp2Date. These programs make it easy to check for new versions of software and to upgrade them without much hassle.
And DO NOT trust your webhost to do this for you!
Assume That You Will Be Hacked
Shakespeare taught us that overconfidence is our downfall. Always assume that one day your server will somehow be hacked, and act as so.

Make sure you backup everything, and do it often. Automate your backups, because it’s annoying to do it manually in my opinion. Verify that your backups actually work. And don’t delete your old backups, keep them all and date them appropriately. I once discovered a backup of mine was corrupted after corrupting the most recent version . . . and I only had that one backup. That was a sucky day for me . . . Assume that maybe one day your house will have a fire, flood, burglary, tornado, or some other ‘wrath of god,’ and any backups stored in your house will be destroyed/lost along with it. Keep a copy of your backups with a trusted friend/relative or in a safety deposit box at a bank.
Also assume that people are trying to hack you, but haven’t succeeded yet. They’ll occasionally test your system for any flaws that come up. You’ll probably see these attempts in your server error log. They’ll be pretty obvious, like attempts from a single IP address trying to access many non-existent files on your server, such as yoursite.com/admin. Don’t ignore them, they may one day ‘pwn joo’. Learn how to use a .htaccess file and IP block those basement dwelling losers cold.
You probably already know this, but don’t use simple passwords, or any password that can be found in a dictionary (heard of the dictionary attack, yet?). And don’t store those passwords on your laptop/PC as it can be physically stolen.
Use a firewall. You [should] know exactly what programs are running on your server, and your firewall should only allow those programs access to the net. A backdoor would probably use a non-approved port number, so a firewall would quickly block it. Be careful when you first turn your firewall on, making sure you allowed valid programs access *first*. If you don’t you’ll end up blocking your own ftp, shell access, control panel, etc. If you don’t know what you are doing, set your firewall up to ‘allow all’. It won’t block anything, but it’ll at least log rogue programs.
Turn off anonymous ftp so a hacker doesn’t have access to your code for potential exploit perusal.
Assume That You Have Already Been Hacked
I went a month before I realized I was hacked. Users started reporting that their virus software would go crazy when they visited my site. Going through my FTP I quickly found files that obviously shouldn’t have been there, but I just didn’t think to stay alert for this. If I paid more attention I would have found them out much sooner.

As soon as you realize you were hacked, try to find out when. Look at the file dates and go through your error logs and ftp access logs. If you have a low traffic site, even go through your normal access logs. It’s always good to at least skim through your error logs once a month to see any failed hack attempts (the successful ones won’t get recorded there). Skim through your ftp access log occasionally for IP address that aren’t yours. You can even block ftp access to any IP that isn’t yours.
Finding that you were hacked, don’t immediately delete all the hack files in a wave of frantic paranoia – save them first on your PC locally for later analysis. Save log files and everything else.
Try to determine if it was a non-directed automated attack (favorite method for spammers), or an intense directed attack specifically at you. The latter is scarier, because the hack will be much better hidden and customized to fool specifically you. If it’s directed at you, they’ll definitely try again. Those that use automated methods wouldn’t think you are worth their time to hack again if their automated attack fails.
The most recommended course of action after being hacked is to simply erase your server and start over again, as there is no real way of knowing if any hidden backdoors were installed. But don’t do this yet – figure out how they got in first. If you don’t, you’ll just reinstall the same security holes and get hacked again. Browsing Google for exploits on the software you used will definitely help you find that hole(s).

Anti ddos Linux

Anti ddos Linux

DDoS protection is a big part of a sysadmins job these days, especially on big forums/hosts.
Obviously, the best plan would be to buy another server, set up a CISCO firewall on it and reroute all traffic to main server. Unfortunately, this would require funds for another dedicated server.

So, the only solution that would work right now is using the box itself as a firewall,this tutorial is for cpanel.

First things first, we make sure that everything is up to date.

Code:
yum update && yum upgrade

Ok, time to install a decent firewall. Because this server is running cPanel, we may as well use a firewall that integrates into cPanel. This is just to allow for easy configuration, CSF is great so we shall be installing that.

Code:
wget http://www.configserver.com/free/csf.tgz
tar -xzvf csf.tgz
cd csf
sh install.sh

Simple as that! Now we need to configure the firewall. Log into http://IP:2086 in an internet browser using your root username and password. Click ConfigServer Security&Firewall under Plugins. Click Firewall configuration.

Code:
Change testing to 0
SYN_FLOOD = 1
PORTFLOOD = 80
DENY_TEMP_IP_LIMIT  = 100000

And click 'change'. Restart csf+lfd then return. Next go to firewall security level. Click High then restart csf+lfd.

Next, we need some extra firewall rules to filter the common packets found in DDoS attacks. We will also limit the number of connections allowed to the server.

Code:
echo 1 > /proc/sys/net/ipv4/tcp_syncookies
iptables -A INPUT -p tcp --syn --dport 80 -d ! 127.0.0.1 -m connlimit --connlimit-above 100 -j REJECT --reject-with tcp-reset
iptables -A INPUT -p tcp --tcp-flags ALL NONE -j DROP
iptables -A INPUT -p tcp --tcp-flags SYN,FIN SYN,FIN -j DROP
iptables -A INPUT -p tcp --tcp-flags SYN,RST SYN,RST -j DROP
iptables -A INPUT -p tcp --tcp-flags FIN,RST FIN,RST -j DROP
iptables -A INPUT -p tcp --tcp-flags ACK,FIN FIN -j DROP
iptables -A INPUT -p tcp --tcp-flags ACK,PSH PSH -j DROP
iptables -A INPUT -p tcp --tcp-flags ACK,URG URG -j DROP
iptables -A INPUT -m state --state INVALID -j DROP
iptables -A OUTPUT -m state --state INVALID -j DROP
iptables -A FORWARD -m state --state INVALID -j DROP

iptables -N syn-flood
iptables -A syn-flood -m limit --limit 1/second --limit-burst 4 -j RETURN
iptables -A syn-flood -j DROP

iptables -N udp-flood
iptables -A udp-flood -m limit --limit 4/second --limit-burst 4 -j RETURN
iptables -A udp-flood -j DROP

iptables -A INPUT -i eth0 -p tcp --tcp-flags  SYN,RST,ACK,FIN SYN,ACK -j syn-flood # SYN flood
iptables -A INPUT -i eth0 -p tcp ! --syn -m state --state NEW -j DROP
iptables -A INPUT -i eth0 -p udp -j udp-flood
iptables -A INPUT -i eth0 -f -j DROP
service iptables save

next, we will install some connection based IP banning. There is some software called ddos_deflate that we are going to use.
Download ddos_deflate.

Code:
wget http://www.inetbase.com/scripts/ddos/install.sh
sh install.sh

Great, that's installed. Now we need to change some settings.

Code:
nano /usr/local/ddos/ddos.conf

And set these vars:

Code:
* NO_OF_CONNECTIONS=100
    * EMAIL_TO="herp@derp.com"
    * BAN_PERIOD=12000
    * APF_BAN=0

Save the file and exit. Next we need to modify ddos_deflate to work with CSF.

Code:
nano /usr/local/ddos/ddos.sh

On line 138 there should be this text

Code:
$IPT -I INPUT -s $CURR_LINE_IP -j DROP

Change that line to

Code:
csf -d $CURR_LINE_IP
Save the file and exit. Next we need to modify ddos_deflate to work with CSF.


Code:
cp -s /usr/local/ddos/ddos.sh /usr/local/sbin/ddos

I have also a mod of ddos_deflate to work with SYN packets. There was once a program called syn_deflate that was exactly this, however the script was stopped being made avaliable and was lost forever!

Code:
mkdir /usr/local/synd
nano /usr/local/synd/synd.conf

The contents of synd.conf:

Code:
##### Paths of the script and other files
PROGDIR="/usr/local/synd"
PROG="/usr/local/synd/synd.sh"
IGNORE_IP_LIST="/usr/local/synd/ignore.ip.list"
CRON="/etc/cron.d/synd.cron"
APF="/etc/apf/apf"
IPT="/sbin/iptables"
##### frequency in minutes for running the script
##### Caution: Every time this setting is changed, run the script with --cron
#####          option so that the new frequency takes effect
FREQ=1

##### How many connections define a bad IP? Indicate that below.
NO_OF_CONNECTIONS=10

##### APF_BAN=1 (Make sure your APF version is atleast 0.96)
##### APF_BAN=0 (Uses iptables for banning ips instead of APF)
APF_BAN=0

##### KILL=0 (Bad IPs are'nt banned, good for interactive execution of script)
##### KILL=1 (Recommended setting)
KILL=1

##### An email is sent to the following address when an IP is banned.
##### Blank would suppress sending of mails
EMAIL_TO="herp@derp.com"

##### Number of seconds the banned ip should remain in blacklist.
BAN_PERIOD=12000

Next

Code:
nano /usr/local/synd/ignore.ip.list

Code:
127.0.0.1
external.ip.address
Code:
nano /usr/local/synd/synd.sh

Code:
#!/bin/sh
load_conf()
{
    CONF="/usr/local/synd/synd.conf"
    if [ -f "$CONF" ] && [ ! "$CONF" ==    "" ]; then
        source $CONF
    else
        head
        echo "\$CONF not found."
        exit 1
    fi
}

head()
{
    echo "Syn-Deflate"
    echo "Based on DoS-Deflate"
    echo
}

showhelp()
{
    head
    echo 'Usage: synd.sh [OPTIONS] [N]'
    echo 'N : number of SYN_RECV connections (default 10)'
    echo 'OPTIONS:'
    echo '-h | --help: Show    this help screen'
    echo '-c | --cron: Create cron job to run this script regularly (default 1 mins)'
    echo '-k | --kill: Block the offending ip making more than N SYN_RECV connections'
}

unbanip()

Next:

Code:
chmod 0755 /usr/local/synd/synd.sh
cp -s /usr/local/synd/synd.sh /usr/local/sbin/synd
/usr/local/synd/synd.sh --cron > /dev/null 2>&1

And we are all done! The server now has some pretty intense DDoS protection now!

Featured post

Vicidial With WebRTC

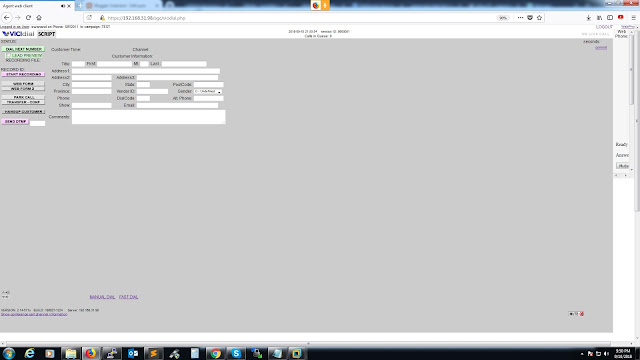
Vicidial With WebRTC VICIDial is well known open source call center software. It has been in use by many small to large scaled con...