##Google Analz## ##Microsoft## ##Googel## Swanand

Tuesday 7 November 2023

Bash Script to install G.729 and G.723.1 codecs for asterisk 16

The following bash script can be used to install the G.729 and G.723.1 codecs on an Asterisk 16.30.0-vici system:

==========================================

#!/bin/bash


# Check if the user has root privileges

if [ "$EUID" -ne 0 ]; then

  echo "Please run this script as root or with sudo."

  exit 1

fi


# Ensure the system is up to date

yum update -y


# Install required packages

yum install -y epel-release

yum install -y libsrtp


# Download the G.729 codec source code

cd /usr/src

wget http://www.linphone.org/snapshots/g729/g729-1.0.4.tgz

tar -xvzf g729-1.0.4.tgz


# Compile and install the G.729 codec

cd g729-1.0.4

./configure

make

make install


# Verify the codec is installed

ls /usr/lib/asterisk/modules/codec_g729.so


# Add G.729 codec support to Vicidial's sip.conf

echo "[general]" >> /etc/asterisk/sip.conf

echo "allow=g729" >> /etc/asterisk/sip.conf


# Reload Asterisk to apply the changes

asterisk -rx "module reload codec_g729.so"

asterisk -rx "sip reload"


# Clean up the installation files

cd /usr/src

rm -rf g729-1.0.4*


echo "G.729 codec installation completed."

================================
END OF SCRIPT
This script will first download the G.729 and G.723.1 codecs from the Asterisk website. Then, it will extract and install the codecs. Finally, it will reload Asterisk to make the changes take effect.

Here is a breakdown of the script:

  1. The wget command is used to download the G.729 and G.723.1 codecs from the Asterisk website.
  2. The tar command is used to extract the G.729 and G.723.1 codecs.
  3. The make command is used to compile the G.729 and G.723.1 codecs.
  4. The make install command is used to install the G.729 and G.723.1 codecs.
  5. The asterisk -rx "dialplan reload" command is used to reload Asterisk to make the changes take effect.

Tuesday 31 October 2023

VICIdial from scratch on Alma Linux 8 with Asterisk 18

Here is a step-by-step installation guide for setting up VICIdial from scratch on Alma Linux 8 with Asterisk 18. This guide explains each point:


**Note**: This guide assumes you have a clean installation of Alma Linux 8 and that you have root or sudo privileges. Be sure to adapt the instructions to your specific environment.


1. Set the timezone to America/New_York:

    ```

    timedatectl set-timezone Asia/Kolkata

    ```


2. Update the system and install essential packages:

    ```

    yum check-update

    yum update -y

    yum -y install epel-release

    yum update -y

    yum install git -y

    yum install -y kernel*

    ```


3. Disable SELinux by editing the SELINUX configuration file and reboot:

    ```

    sed -i 's/SELINUX=enforcing/SELINUX=disabled/g' /etc/selinux/config

    reboot

    ```


4. Set the default editor to nano:

    ```

    echo "export EDITOR='nano'" >> /etc/bashrc

    chmod +x /etc/rc.d/rc.local

    systemctl enable rc-local

    systemctl start rc-local

    systemctl status rc-local

    ```


5. Install development tools, additional repositories, and required packages:

    ```

    yum groupinstall "Development Tools" -y

    yum -y install https://dl.fedoraproject.org/pub/epel/epel-release-latest-8.noarch.rpm

    yum -y install http://rpms.remirepo.net/enterprise/remi-release-8.rpm

    yum -y install yum-utils

    dnf module enable php:remi-7.4 -y

    dnf -y install dnf-plugins-core

    dnf config-manager --set-enabled powertools

    ```


6. Install PHP and various PHP modules, as well as other required packages:

    ```

    yum install -y php php-mcrypt php-cli php-gd php-curl php-mysql php-ldap php-zip php-fileinfo php-opcache wget unzip make patch gcc gcc-c++ subversion php php-devel php-gd gd-devel readline-devel php-mbstring php-mcrypt php-imap php-ldap php-mysql php-odbc php-pear php-xml php-xmlrpc curl curl-devel perl-libwww-perl ImageMagick libxml2 libxml2-devel httpd libpcap libpcap-devel libnet ncurses ncurses-devel screen kernel* mutt glibc.i686 certbot python3-certbot-apache mod_ssl openssl-devel newt-devel libxml2-devel kernel-devel sqlite-devel libuuid-devel sox sendmail lame-devel htop iftop perl-File-Which php-opcache libss7 mariadb-devel libss7* libopen*

    yum -y install sqlite-devel

    ```


7. Configure Apache to serve VICIdial recordings:

    ```

    nano /etc/httpd/conf/httpd.conf

    ```


    Add the following lines to the configuration file:


    ```apache

    CustomLog /dev/null common

    Alias /RECORDINGS/MP3 "/var/spool/asterisk/monitorDONE/MP3/"

    <Directory "/var/spool/asterisk/monitorDONE/MP3/">

        Options Indexes MultiViews

        AllowOverride None

        Require all granted

    </Directory>

    ```


8. Configure PHP settings:

    ```

    nano /etc/php.ini

    ```


    Update the php.ini file with the following values:


    ```apache

    error_reporting = E_ALL & ~E_NOTICE

    memory_limit = 448M

    short_open_tag = On

    max_execution_time = 3330

    max_input_time = 3360

    post_max_size = 448M

    upload_max_filesize = 442M

    default_socket_timeout = 3360

    date.timezone = America/New_York

    ```


9. Restart the Apache web server to apply the changes:

    ```

    systemctl restart httpd

    ```


10. Install MariaDB and configure it:

    ```

    dnf install -y mariadb-server mariadb

    dnf -y install dnf-plugins-core

    dnf config-manager --set-enabled powertools

    systemctl enable mariadb

    cp /etc/my.cnf /etc/my.cnf.original

    ```


    Create or edit the my.cnf file with the provided configuration.


11. Install Perl and Perl modules:

    ```

    yum install perl-CPAN -y

    yum install perl-YAML -y

    yum install perl-libwww-perl -y

    yum install perl-DBI -y

    yum install perl-DBD-MySQL -y

    yum install perl-GD -y

    ```


    Install various Perl modules using cpan and cpanm.


12. Install the Asterisk Perl module:

    ```

    cd /usr/src

    wget http://download.vicidial.com/required-apps/asterisk-perl-0.08.tar.gz

    tar xzf asterisk-perl-0.08.tar.gz

    cd asterisk-perl-0.08

    perl Makefile.PL

    make all

    make install

    ```


13. Install other required libraries and tools like Lame and Jansson.


14. Install Dahdi, LibPRI, and Asterisk. Configure and compile Asterisk with the required modules.


15. Set up MySQL users and databases for VICIdial.


16. Install VICIdial:

    ```

    mkdir /usr/src/astguiclient

    cd /usr/src/astguiclient

    svn checkout svn://svn.eflo.net:3690/agc_2-X/trunk

    cd trunk

    perl install.pl

    ```


17. Update area codes and IP settings as needed.


18. Configure `/etc/rc.local` and add various scripts for system maintenance and startup.


19. Schedule various cron jobs for VICIdial, database maintenance, and other tasks.


20. Reboot the system.


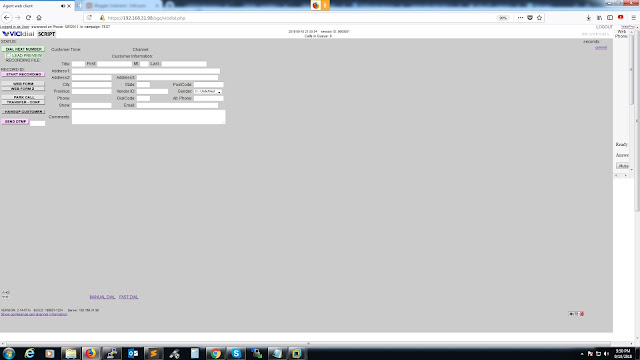
You can now access VICIdial through your web browser using the provided URLs. 

Saturday 14 October 2023

Setting up a Continuous Integration/Continuous Deployment (CI/CD) pipeline

 Setting up a Continuous Integration/Continuous Deployment (CI/CD) pipeline is a critical part of modern software development. Below, I'll provide a step-by-step guide with an example using popular tools like GitHub, Jenkins, and Docker. Please note that there are many variations and tools available for CI/CD, but this example offers a general understanding of the process.


Step 1: Set Up Version Control (e.g., GitHub)


1. Create a GitHub Repository:

   - Go to GitHub and create a new repository for your project.

   - Initialize it with a `README.md` file or push your existing code.


2. Clone the Repository:

   - Clone the repository to your local development environment using Git.


Step 2: Develop Your Application


1. Write Code:

   - Develop your application or make changes to an existing one.


2. Test Locally:

   - Test your code on your local development environment to ensure it works as expected.


Step 3: Create a Docker Container (Optional)


1. Dockerize Your Application:

   - Create a `Dockerfile` to package your application into a Docker container.

   - Build and test the container locally.


Step 4: Configure CI/CD with Jenkins


1. Set Up Jenkins:

   - Install Jenkins on a server.

   - Access the Jenkins dashboard in your web browser.


2. Install Plugins:

   - Install necessary plugins like "GitHub Integration," "Docker," and "Pipeline."


3. Create a Jenkins Pipeline:

   - Create a Jenkinsfile in your GitHub repository.

   - Define the stages, including steps for building, testing, and deploying your application.


   Example Jenkinsfile:

   ```groovy

   pipeline {

       agent any

       stages {

           stage('Build') {

               steps {

                   sh 'mvn clean package' // Build your application

               }

           }

           stage('Test') {

               steps {

                   sh 'mvn test' // Run tests

               }

           }

           stage('Deploy') {

               steps {

                   // Deploy to a server or container orchestration platform (e.g., Kubernetes)

               }

           }

       }

   }

   ```


4. Set Up Jenkins Job:

   - Create a new Jenkins job, selecting "Pipeline" as the job type.

   - Link your GitHub repository and specify the Jenkinsfile location.


Step 5: Automate CI/CD with GitHub Actions (Optional)


1. GitHub Actions Workflow:

   - Create a `.github/workflows` directory in your GitHub repository.

   - Define a YAML workflow file to automate your CI/CD process.


   Example `.github/workflows/main.yml`:

   ```yaml

   name: CI/CD


   on:

     push:

       branches:

         - main


   jobs:

     build:

       runs-on: ubuntu-latest


       steps:

       - name: Checkout code

         uses: actions/checkout@v2


       - name: Build and test

         run: |

           mvn clean package

           mvn test


       - name: Deploy

         run: |

           # Deploy to your server or container orchestration platform

   ```


Step 6: Test CI/CD


1. Commit and Push:

   - Commit your code changes to your GitHub repository and push them.


2. CI/CD Execution:

   - Your CI/CD pipeline (Jenkins or GitHub Actions) will automatically trigger when you push to the configured branch (e.g., main).

   - It will build, test, and deploy your application based on the defined stages.


3. Monitor and Troubleshoot:

   - Monitor the pipeline execution for errors and troubleshoot issues if needed.


This is a simplified example of setting up a CI/CD pipeline. In practice, you may need to configure more complex workflows, add security measures, and integrate with various tools and services to meet the specific needs of your project.

DevOps tools are used to automate and streamline the software development and delivery process

 DevOps tools are used to automate and streamline the software development and delivery process. They help teams to build, test, deploy, and monitor software more efficiently and reliably.

Here are some of the most popular DevOps tools and their uses:

  • Git: A version control system used to track changes to files and collaborate with other developers.
  • Docker: A containerization platform used to package and deploy applications in isolated environments.
  • Kubernetes: An orchestration platform used to manage containerized applications at scale.
  • Terraform: An infrastructure as code (IaC) tool used to automate the provisioning and management of infrastructure resources.
  • Ansible: A configuration management tool used to automate the configuration of servers and other systems.
  • Jenkins: A continuous integration (CI) and continuous delivery (CD) tool used to automate the building, testing, and deployment of software.

Examples:

  • A team might use Git to track the changes to their code and collaborate with other developers on the same project.
  • A team might use Docker to package their application into a container so that it can be deployed easily and consistently on different environments.
  • A team might use Kubernetes to manage their containerized applications at scale, automatically scaling up or down the number of containers running based on demand.
  • A team might use Terraform to automate the provisioning and management of their infrastructure resources, such as servers, databases, and load balancers.
  • A team might use Ansible to automate the configuration of their servers, such as installing and configuring software, creating user accounts, and setting up security permissions.
  • A team might use Jenkins to automate the building, testing, and deployment of their software, automatically deploying the latest changes to their application to production whenever a new commit is made to the code repository.

DevOps tools can be used in a variety of ways, depending on the specific needs of the team and the project. However, they all share the common goal of helping teams to automate and streamline the software development and delivery process.

Here is a cheat sheet of common DevOps tools and commands with examples

Here is a cheat sheet of common DevOps tools and commands with examples:

Tools

  • Git: A version control system for tracking changes to files.
  • Docker: A containerization platform for building and running applications in isolated environments.
  • Kubernetes: An orchestration platform for managing containerized applications.
  • Terraform: An infrastructure as code (IaC) tool for automating the provisioning and management of infrastructure resources.
  • Ansible: A configuration management tool for automating the configuration of servers and other systems.
  • Jenkins: A continuous integration (CI) and continuous delivery (CD) tool for automating the building, testing, and deployment of software.

Commands

  • git clone <url>: Clone a remote Git repository to your local machine.
  • git checkout <branch>: Switch to a different branch in Git.
  • git push <remote> <branch>: Push the local branch to the remote repository.
  • git pull <remote> <branch>: Pull the remote branch to the local repository.
  • docker build -t <image name> <directory>: Build a Docker image from a directory.
  • docker run -d -p <port>:<port> <image name>: Run a Docker image in detached mode, publishing the specified port to the host.
  • kubectl get pods: List all Kubernetes pods.
  • kubectl apply -f <file name>: Apply a Kubernetes manifest file.
  • terraform init: Initialize Terraform.
  • terraform plan: Show the changes that Terraform would make to the infrastructure.
  • terraform apply: Apply the changes planned by Terraform.
  • ansible-playbook <playbook name>.yml: Run an Ansible playbook.
  • jenkins job build: Build a Jenkins job.

Example:

To build a Docker image from a directory and run it in detached mode, publishing port 80 to the host:

docker build -t my-image .
docker run -d -p 80:80 my-image

To apply a Kubernetes manifest file:

kubectl apply -f my-deployment.yml

To initialize Terraform and plan the changes that would be made to the infrastructure:

terraform init
terraform plan

To apply the changes planned by Terraform:

terraform apply

To run an Ansible playbook:

ansible-playbook my-playbook.yml

To build a Jenkins job:

jenkins job build 

These are just a few examples of the many DevOps tools and commands available. For more information, please see the documentation for the specific tools that you are using. 

Featured post

Vicidial With WebRTC

Vicidial With WebRTC VICIDial is well known open source call center software. It has been in use by many small to large scaled con...